Showing posts with label Improv-isation. Show all posts

Monday, June 10, 2013

Home Improv-isation: Part 2


About a month ago, I spilled the beans about how skilled I am at sewing fond I am of using tape for DIY projects. If you also lack sewing skills, you'll likely appreciate the following two improv-isation projects.

I'd been wanting to add a table and some artwork to our foyer for a while, but just hadn't found the right pieces. As luck would have it, within one week I was able to find and create everything I needed!

Exhibit C - Foyer Table Drape Cloth

Living around the corner from a Goodwill definitely has its advantages!
I recently found the perfect sized table to put in our foyer. The only problem is that it was begging to be covered, since I bought it secondhand and has some wear and tear (but I can't resist a bargain!). After I bought a burlap-style tablecloth to conceal the table, I decided it needed a little color. Then I remembered that I still had some fabric leftover from our family room curtains. So, I cut a piece to size and then attempted to seal the edges together using fusible webbing.

Well, I clearly either 1) didn't read the instructions on the box correctly (who has time for that)? or 2) bought the wrong kind of fusible webbing because I absolutely could not get the stuff to work. Rather than head back to the store to try and find the right kind, I decided to instead turn to a trusty friend.

No, not duck tape. Good 'ol industrial-strength glue. May I introduce you to E-6000.


This.stuff.rocks. You can use it for all kinds of projects, including on fabric. All I had to do was iron the edges of the fabric over to create a clean edge, and then glue the "hem" that I'd just created. Not even 15 minutes later, I had my drape. 

It's good thing I didn't mess this project up, because I only have a little bit of this fabric left.
Could I have used duck tape to hold this together? Sure. But I had another project where I knew my trusty companion would be needed. 

Exhibit D - Burlap-covered Poster Frame

This poster, which is a compilation of Italian postcards, is an awesome daily reminder of our honeymoon in Italy.
I was at the Ballard Designs showroom last month when I found a pile of what the store was calling "book wraps." Well, to me these looked like reproductions of vintage posters. And there were only $6. SOLD!

They had a handful of different posters, and the images were either French or Italian. Since we spent our honeymoon in Italy, I grabbed the three that were Italian (a map of the whole country, a map of Rome and the one above) plus a map of the whole world. But then I needed to figure out a way to display the posters.

I knew I didn't want to go the traditional frame route, but I did give some thought to making some pallet wood display boards. After weighing my options, I decided to do something that didn't involve hammer and nails. (And splinters.)

All I needed to complete this project was foam core board, burlap, thumbtacks, picture hangers and - you guessed it - duck tape. I'm fairly certain you can figure out how to put it together, but just for fun, here's a picture of the back of it.

I should have invested in this stuff years ago. 
And, voila! We finally have some artwork for our foyer. The cool thing about these boards is that now I can easily swap out the posters should I find something else that we want to hang up. I'm already thinking about what I can create and hang up for holidays and special events.


Finishing this project and knowing that I could easily swap out the posters down the road inspired me to get cracking on another project that I've been procrastinating thinking about. Believe it or not, duck tape was not used at all. But it did involve spray paint ... can you guess which project I'm referring to?

Monday, May 6, 2013

Home Improv-isation: Part 1

It was a busy weekend 'round these here parts. That is to say I am super thankful that the nasty Atlanta weather pretty much let me clear my agenda to tackle a bunch of projects around the house. And I'm also thankful that my husband's semester is over, which means I was easily able to sweet-talk him into helping me finish said projects. (I'm also pretty sure that he doesn't trust me with his drill, so it really doesn't take much convincing.)

All of the projects that were completed this weekend have one major thing in common ...  I had to improvise. Thus, I bring you the latest installment of Life @ Laurel ... Home Improv-isation: Part 1.

Exhibit A - Dining Room Curtains

And the curtains were hung by my husband with care ... in hopes that soon enough I'd get out of his hair ...
I'd been poking around for a set of dining room curtains for a while now, and finally found some (and on sale!) at West Elm. When I placed my order I learned they were back ordered, but then they actually arrived a lot faster than West Elm promised -- which was great! So, Saturday morning I dug through the small pile curtain rods that came with us when we moved and found one long enough. Awesome.

But ... no mounting brackets to be found. Of course. I had to make a quick run to Target anyway (I mean, seriously, what trip to Target is ever quick?!), so I added mounting brackets to my list. And wouldn't you know it -- you can't just buy curtain rod mounting brackets -- you gotta buy the whole package. Well, I wasn't about to do that. So, I improvised.

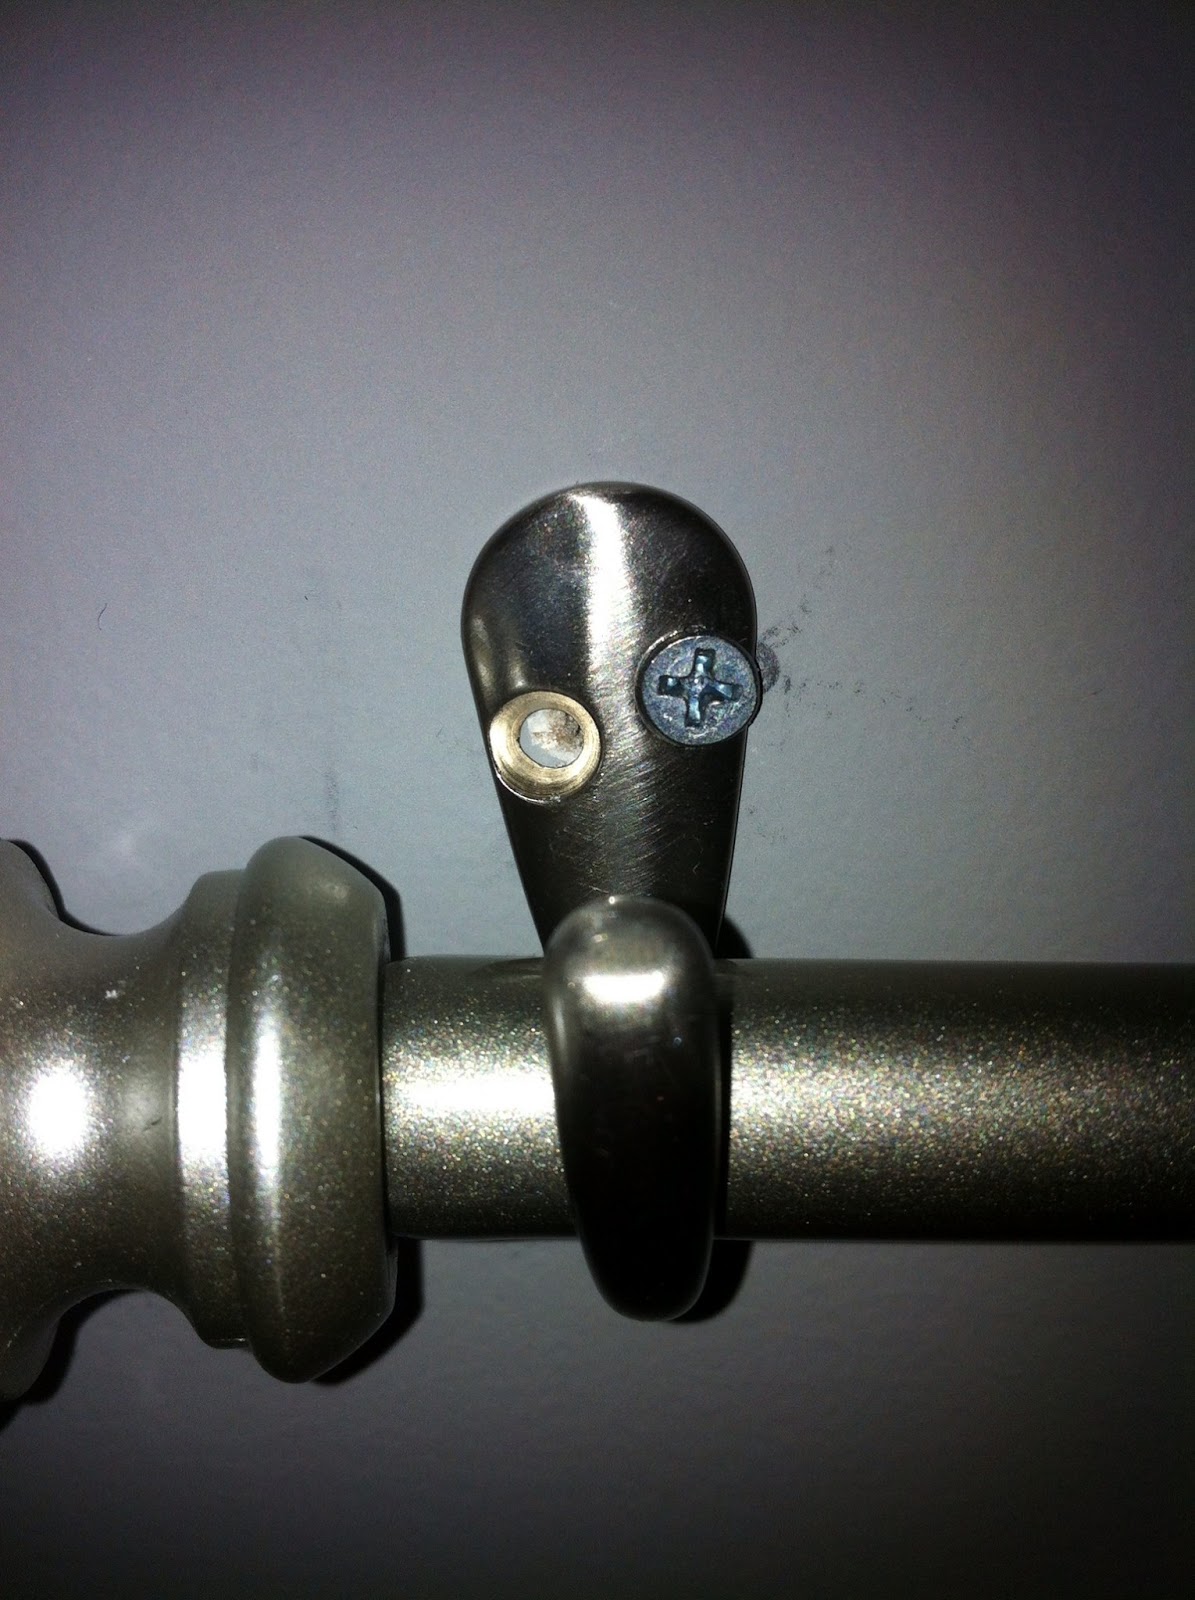
I'd already picked up two packs of hooks for our closets, and as I looked at the pile of goodies in my hands (Yes, hands. I no longer use a basket or cart at Target unless I have Sloan with me. Because if I just use my hands, I actually walk out only with what I intended to purchase.) I realized that these robe hooks would probably be the perfect size for this curtain rod. So I wandered back and grabbed two more packs.

I have a funny feeling that Julie Nobles is going to like these curtains! 
It wasn't until I took this close-up that I realized Matt decided that just one screw is all that was needed to hold this in place. Works for me!
Doesn't look too bad, huh? OK, maybe the close-up looks a little wonky. But, not too shabby for only $3.

Exhibit B: Breakfast Nook Curtains

I'm a big fan of discount retailers like Joss & Main, One Kings Lane and Zulily. When I was still super sleep deprived during Sloan's infancy, I had a VERY bad habit of shopping online in my sleep. Literally. I'd get up with her for the "zero dark thirty" feeding and pass time looking at stuff online. Then -- oops! I bought stuff. (Too much stuff.)


Like these curtains, for example! For our breakfast nook, I was thinking that a simple valance would do the trick. These are actually curtain panels that originally had little ties at the top for you to tie around the top of a curtain rod. I just cut the ties off, turned the panels horizontal and then folded them down to the right size, then sewed a pocket rod into the fabric to hold it all in place.


Wait ... did you think that I actually sewed these? Ha! No - I didn't sew anything. I grabbed the first roll of packing tape I found in the garage and taped these bad boys together.

Matt said I shouldn't expect this tape to hold for very long. Maybe I actually will be forced to try to sew them together at some point.
I love the color that this adds to our breakfast nook, and I don't think the tape is visible to the nekkid eye (unless you've read this blog, and then you're in on the secret!). So far, these have been holding up pretty well. However, I can't say the same thing about one of the other projects I "finished."

#diyfail
More to come about that soon -- as soon as I find my duck tape ...